Hello and welcome to the 2nd series of Use It! classes.
So just a quick recap on how the class works: every day I will show you a new card. Each card will showcase a different technique, but all 5 cards will be created with the same selection of supplies. I hope that you are inspired to look back at your stash and see how you can use what you have already got!
Supplies
For this class, I have chosen 5 supplies to work with (along with inks / card stock etc).
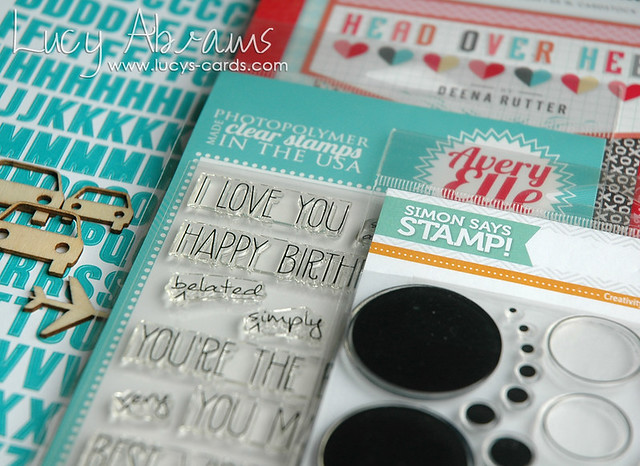
Supplies
For this class, I have chosen 5 supplies to work with (along with inks / card stock etc).

They are:
Handwritten Notes Stamp Set by Avery Elle. I've had this a while and not got around to opening it.
The awesome Lots of Dots Stamp Set by Simon Says Stamp is fun for many themes of card.
The cute Head Over Heels 6 x 6 Pad by Echo Park is useful for more than just Valentine's cards.
and versatile Alphabet Stickers by Kelly Purkey.
And now for today's lesson:
Lesson 1 - Embellishing Embellishments
Creation
OK - so this is a rather fiddly card, but I think the end result is quite fun and unique. Certainly not something you could buy in a store. :)
First, cover a wood veneer car in a thin layer of Multi Matte Medium then sprinkle with Martha Stewart White Gold Glitter. This glitter is lovely - a mix of silver and gold tones.
First, cover a wood veneer car in a thin layer of Multi Matte Medium then sprinkle with Martha Stewart White Gold Glitter. This glitter is lovely - a mix of silver and gold tones.
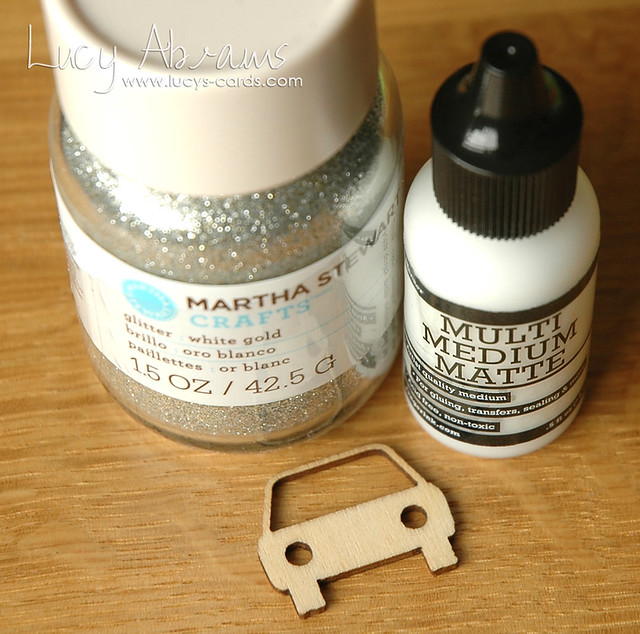
You may need to stick a pencil into the round holes on the car to clear up any drips… I did! :)
Next, you will need some silver metallic thread (mine is Gutermann)and some tiny sequins. (Love THESE ones).
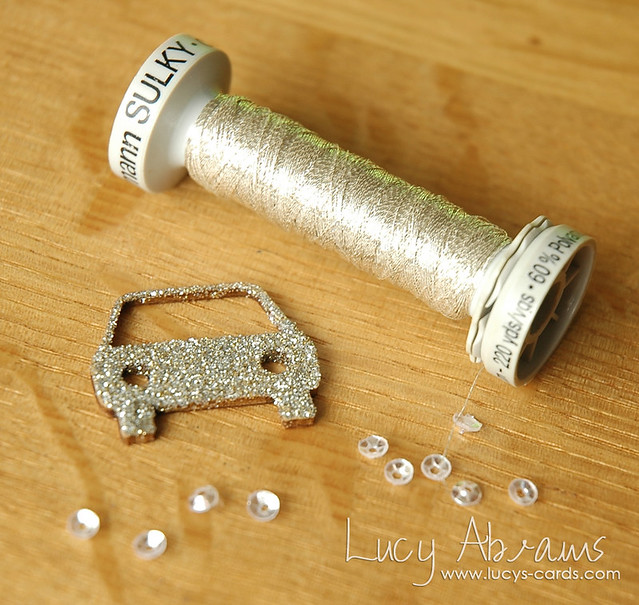
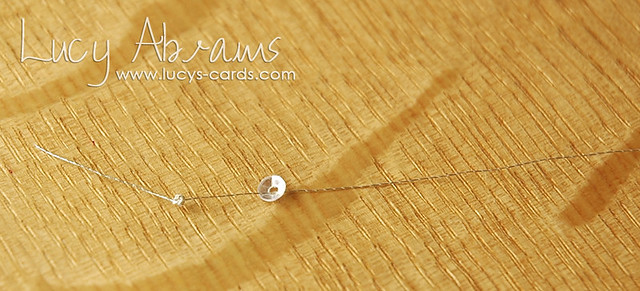
Here's the fiddly bit. Tie knots in the thread until you have a knot big enough to stop the sequin sliding off. (I did about 7 knots). Then thread the sequin onto the thread. Repeat this 3 times.
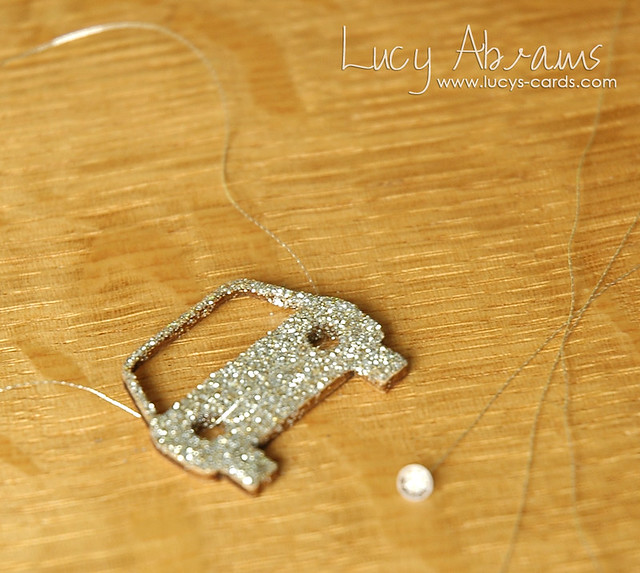
Now, thread some silver thread through the two headlight holes in the glittery car.
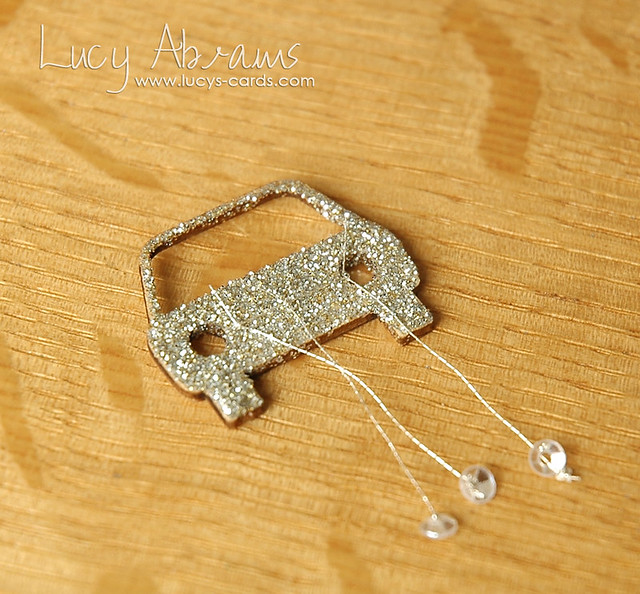
Finally, tie the sequin threads onto the headlight thread and trim the ends. Tie the two ends of the headlight thread securely together and adhere to the back of the car.
Now you have your fun 'Just Married' wedding car complete with sequin tin cans. It's so sparkly and cute.
Next, work out the positioning of your sentiment and image. Initially, I planned to have my car in the centre. I changed my mind after a bit of fiddling about.
Stamp the sentiment in black ink on some Sea Glass Cardstock.
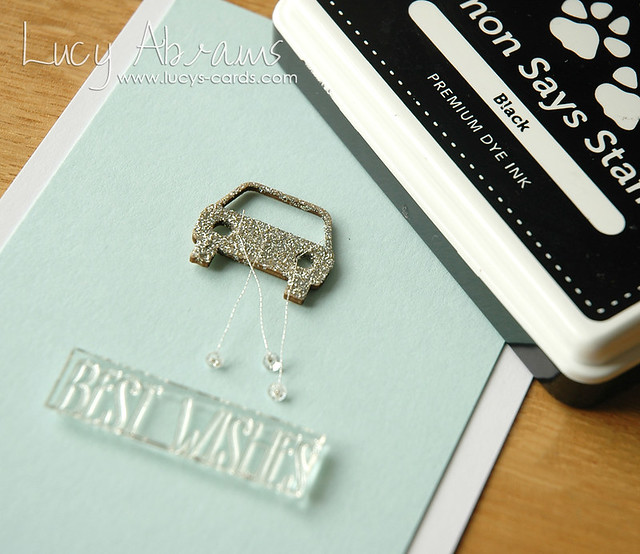
Then adhere the Sea Glass panel to some white cardstock.
Mask the sentiment with a post it note, then sprits the card with some Calico Shine Mister Huey's.
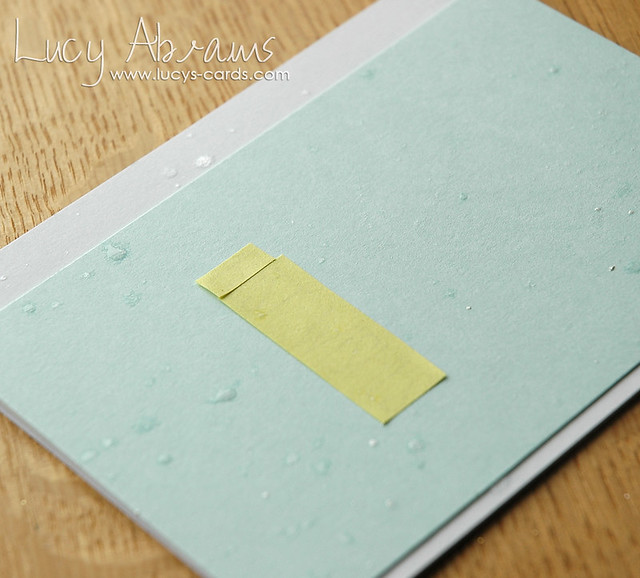
Once dry, adhere the car to the card and you are finished.
Hooray.
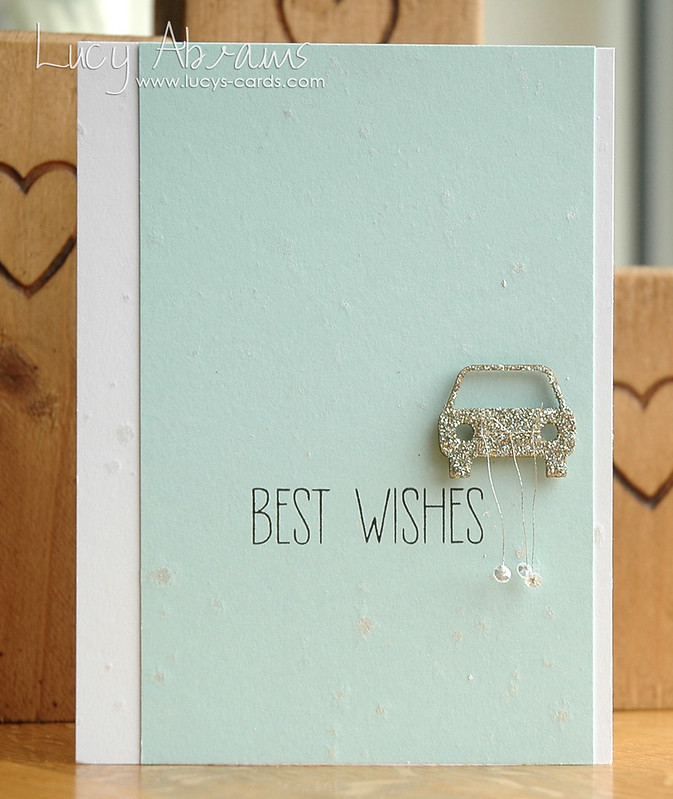
A bit fiddly, but so shiny and glittery - just what a wedding card should be.
Variations
Of course, without the sequins, this glittery car would be great for any travel themed card. Especially someone going on a road trip. :) You could even customise the colour of your glitter to the colour of the card's recipient's car. Fun.
Want to see some more cards where I've embellished wood veneer… click the pics to them see in full:
Want to see some more cards where I've embellished wood veneer… click the pics to them see in full:
That's all for today. Tomorrow I will share Lesson 2 - One Layer Cards. Hope to see you then. As always, feel free to leave a comment with any questions or requests.
Supplies



19 comments:
Fiddly, maybe. Cute, definitely!!!
Excited to see what else comes this week. Thank you!
Wow love this idea Lucy!!
What a clever idea, Lucy! You are so creative! Adorable card!
Worth the fiddly bit..looks fab x
Love the tutorial. Thanks Lucy. Great card.I love the glittered car and the "tin cans"!
I really enjoy your classes, Lucy! This wedding card is fabulous! Love the sparkly car and the dangling sequins! So creative and so perfect for a celebration card!!!
This is gorgeous and I will have to case this for sure!
Oh I love your tutorial with wood veneers. Your card is amazing ! I love it ! Thanks a lot to share your bright ideas !
Ooohhh these classes are great Lucy I love your card.
I'm hoping to get married in October 2015. Just sayin'... ;)
Such a great idea Lucy and like you say a very unique card unlike anything in the shops....fab!
Love your sparkly car - so clever! I have a set of these wood veneers that I haven't used....Looking forward to tomorrow's lesson :)
Oh what a great way to embellish that wood veneer car!!
Fabulous Lucy.
How very clever you are, Lucy! This is definitely a one of a kind card and the recipient would love it!
This is just brilliant! LOVE the embellished veneer and the dangling sequins are such a cute idea!
What a fabulous idea...love the the shiny car and the fun "cans" celebrating the day! So excited to what you create this week.
Oooooooh, I have a wedding coming up next month! This is so adorable and I think I have all the supplies; thanks of rthe inspirtion Lucy!
Absolutely BRILLIANT, Lucy!
Post a Comment