
Hello, and welcome to my stop on the Hero Arts and A2Z Scrapbooking Blog Hop.
Hero Arts are happy to announce that A2Z Scrapbooking is now their new digital retailer, and they will soon be offering all Hero's digital kits, cut files and printables. Yay. And in honour of this happy event, girls from Hero and A2Z have teamed up to participate in a big digi hop. And there's a giveaway too - but more on that later!
I have a card over at Hero Arts, the first stop on the hop, so head over there to start from the beginning if you have not already.
And I have another card here too, along with a step by step tutorial sharing a fun digital technique.
For this card, I used a stamp from the City Adventures digikit to create my skyline and a stamp from The Firmament kit for my sentiment.
For this card, I used a stamp from the City Adventures digikit to create my skyline and a stamp from The Firmament kit for my sentiment.
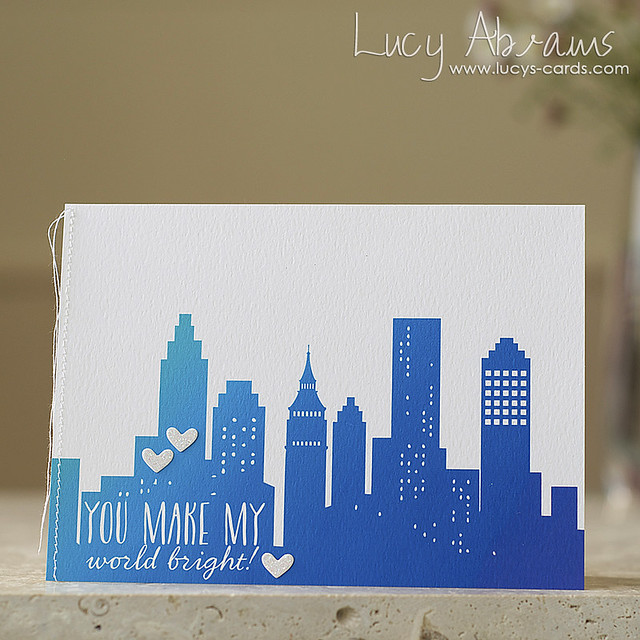
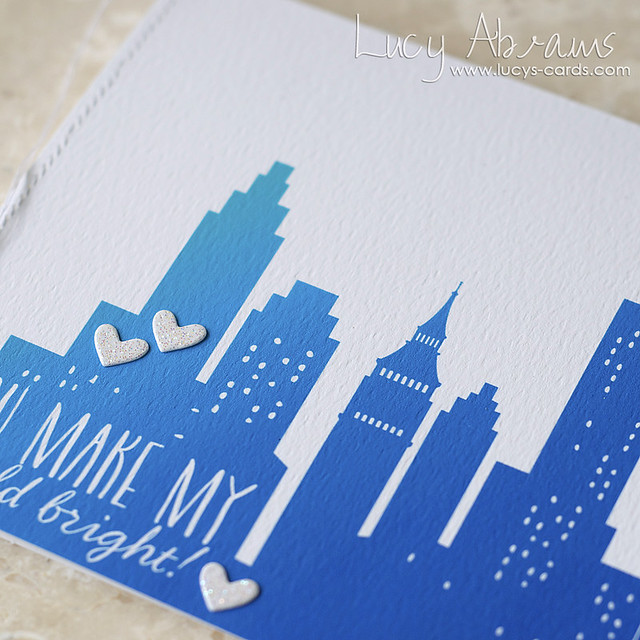
Printing digital stamps onto textured card stock really enhances a flat card like this… and a few die cut glittery stars and some stitching add a little extra dimension too. :)
-----------TUTORIAL---------
Creating this ombre effect is fun, and pretty easy. (I was originally inspired by THIS very useful video tutorial by the talented Shanna Noel)
Creating this ombre effect is fun, and pretty easy. (I was originally inspired by THIS very useful video tutorial by the talented Shanna Noel)
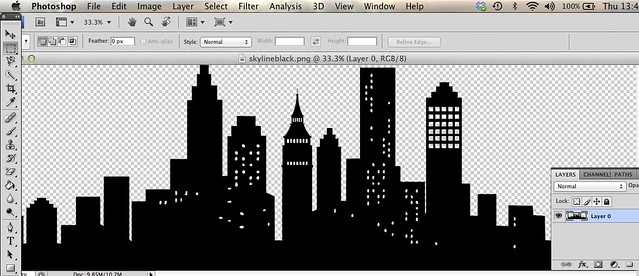
First, open the SkylineBlack.png stamp in Photoshop.
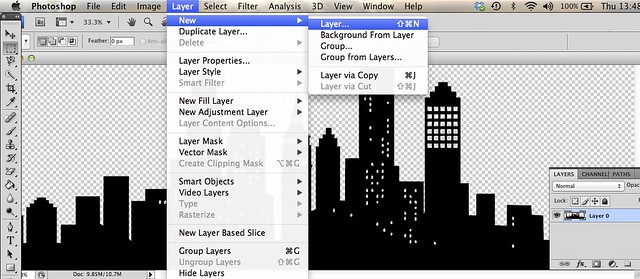
Next, create a new layer.
Select the brush tool in the left hand column. Then change the brush to a 300px soft brush, using the drop down box in the top left.
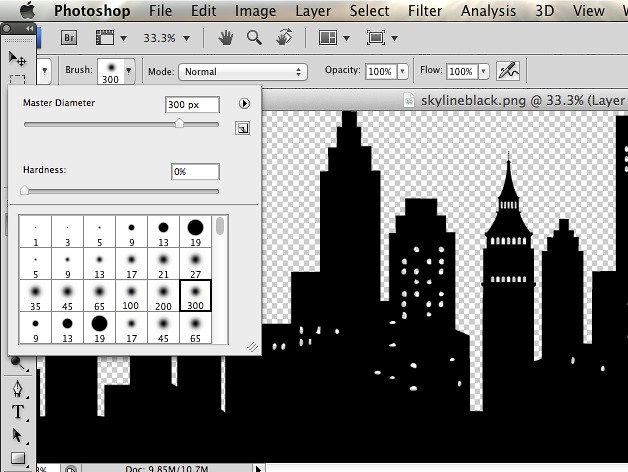
Next, change the colour of the brush using the little colour box in the bottom of the left column. I chose a royal blue to start with.
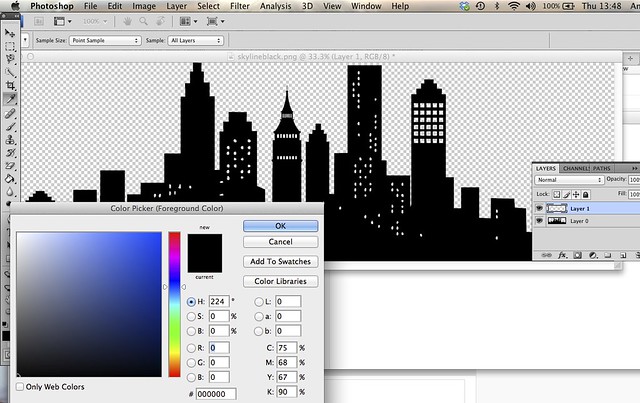
Then add a wash of colour in a diagonal line over the skyline. Make sure you are working on the new blank layer and not the original layer.

One you have a broad stripe, change the colour. I did this by altering the H option in the Colour Picker box. I just moved it down a few degrees each time.
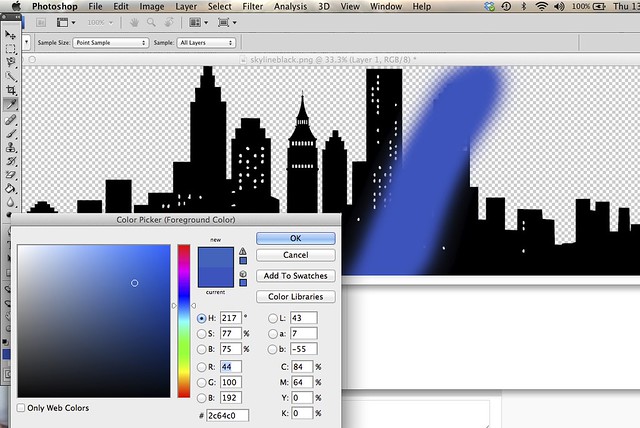
Add a second strip in the second colour.
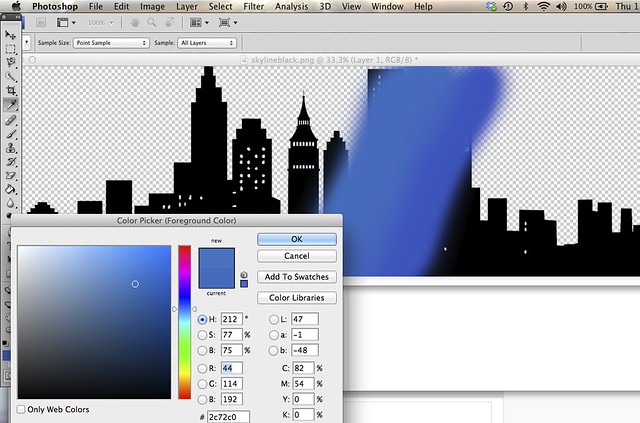
Keep altering the colour, making sure your changes each time are subtle and blend well with the previous colour.
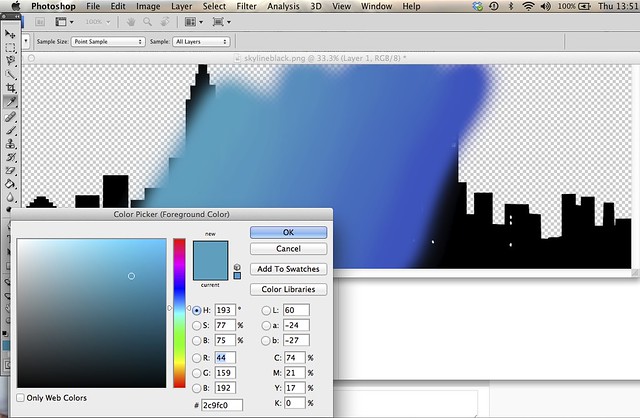
Once finished it looks a mess. :)
Go to layer, and then Create Clipping Mask.
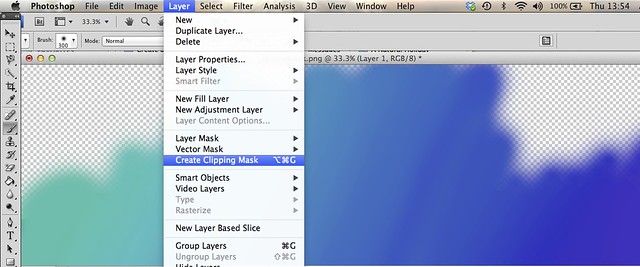
And as if by magic, this happens. Awesome, right!!!
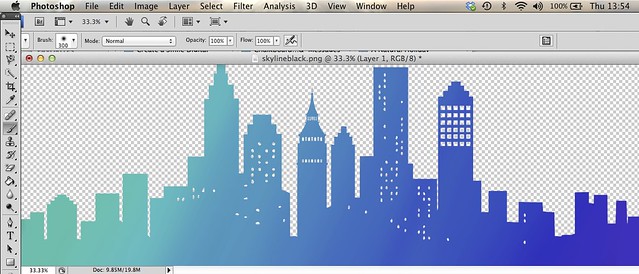
This is such a fun way to create a different look with digital stamps. I hope you have a go!
----------GIVEAWAY---------
A2Z Scrapbooking are generously offering a $50 gift certificate to one lucky commenter. The prize winner will be randomly selected from all comments received on all the blogs on the hop. Leave your comment here by Sunday August 31st and check out the A2Z blog on 3rd September to see if you have won. :)
Right, now it's time to hop on.
Next up it's
Chitra Nair
If you get lost, a full list of blogs is available on the Hero Arts blog.
Happy hopping.
Supplies





46 comments:
Lovely card.
I've ALWAYS wanted to know how to colour black images in Photoshop, I think you just made my day!
waue this is awsome thank you for inspiration
Gotta try that in PSE . . . the skyline is fabulous!
Beautiful card! Love the color!
This is gorgeous! LOVE the ombre, so striking!
Love Love Love the Ombre look! Oh how I wish I knew how to use Photoshop!!
If you ever see or hear of a really good online class for a true beginner, please share! I've tried the program trial a few times, and just can't seem to figure it out, I'm such a visual learner, so learning from seeing others, is how I need to go!
I use Microsoft Word for all my Digital/Hybrid Cards and now will have to see if I can figure out how to do this Ombre coloring in that program!
Love it! Thanks for another great share! You are always so talented with all the digital creations you make!!
Beautiful card and awesome tutorial!
Your coloring using Photo Shop is lovely - what a grand idea - there is so much to learn in cardmaking - lovely card creation! Have a blessed day!
Like the bldg silhouette look and the way you colored it.
Melissa
"Sunshine HoneyBee"
Gorgeous card, Lucy! I love the ombre effect on the skyline and the pretty sparkle on the hearts that ties in so well with the sentiment!
Wow what a fun technique! Love your card!
Lucy, this is stunning! I had no idea that you could create an ombre look on a digital image :)
Stunning, wow the ombré look is simply fabulous, so cool, love it!!!
Your card is fun and fabulous I like the idea of textured paper and adding a bit if dimension to make this card pop great job thanks for the tips!
fantastic use of ombre, i love this blue effect!
Love the ombre!
Gorgeous card, great tutorial!!
This is absolutely amazing! Thanks for the tutorial!!
Wow, the ombre skyline is absolutely gorgeous, Lucy! I love how you embellished it with stitching and white glittery hearts!
Gorgeous! I love skylines and your suggestion to use textured paper is eye-opening for me. So easy, why didn't I think of that? Thank you for sharing!
Fabulous card Lucy and thank you for the tutorial, I also loved the card you made for the HA blog, so pretty with the gold star and heart!
Ah, Lucy! You have inspired me to start using my Photoshop again!! There are so many features I haven't used and this ombre look is definitely on my list to try!! I just love your card since I love silhouette building!
Guauuuuuu love it
Love this! Digital stamps and Photoshop, a match made in heaven!
Love your color combinations!
What a super skyline! Love the color variation. Thank you.
Lovely, simple and sweet card. Really like it.
i love this colour effect. Photoshop its fantastic program. Good Job !
Cool project. Got a question for you. Why did you decide to do paintbrush strokes of slightly different colors rather than using the gradient tool?
(For photoshop newbies use just pick two colors (to replace the black and white fore/back ground colors, select the gradient tool and drag across that same new layer.)
Did your technique give you more control? Does using gradient here give you too different a look? Put another way, when would I want to use this technique rather than gradient?
Love skyline images and this one looks awesome with the ombre look.
Love how your ombre skyline turned out!
The gradient skyline looks absolutely amazing! What a terrific card.
Lovely skyline card. I really like the color gradient used. Thanks for sharing the tutorial.
T -good question. :)
I never knew there was a gradient tool. I know very little about Photoshop. For me, it's all trial and error. I have never quite worked out how to select colours etc… obviously I need to look at some tutorials myself. :)
Love your design and appreciate the tips.
WOW this was nice!
Lucy this is really cool! Thanks for sharing the digital tips. I can't wait to try it out. Thanks for participating in the blog hop.
Elizabeth Campau
a2z Scrapbooking DT
Beautiful ombre effect for this card, Lucy!
This is amazing! It takes my breath away! Definitely the prettiest skyline I have ever seen! Thanks for sharing!
Very nice look and great to see what you can do with the color in the Photoshop software.
Great tutorial and card. Thank you for the inspiration.
What a great tutorial - and a beautiful card!!
AWESOME card!!! I love the effect of the different shades of blue. Great tip on using textured cardstock. Thanks so much for the step-by-step tutorial, too! Definitely pinning this card for future reference!
Love this skyline card and the blue gradient you used!
Lovely gradient. That is very good guide, thanks for sharing. Photoshop is such piece of software that can be applied everywhere. I'm using https://aurorahdr.com/create-hdr-with-photoshop-elements11 with Photoshop. It can make fantastic HDR. Try it.
Post a Comment